
Navigation
- Introduction
- Hybrid Signing
- Select recipient
- Add signing fields
- Edit signing fields
- Save & Close
- Send for signing
- Cancel
Introduction
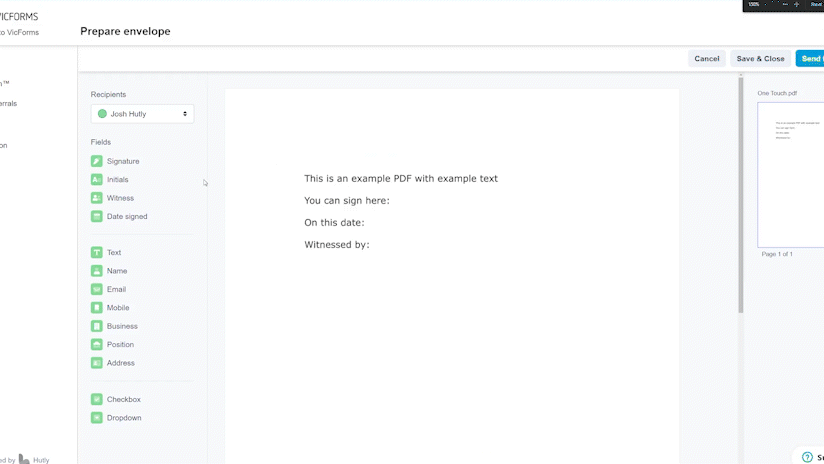
Using Hutly One Touch™ you are able to easily add signing fields to your documents with a simple drag and drop interface.
Hybrid Signing
If you are sending a Hybrid signing document (A VicForms document with attachments) you will see the signing fields for the VicForms document have already been added. To add the signing fields to your attachments simply scroll past the VicForms document to your attachments.)
Select recipient
Before adding signing fields to your documents ensure you have the correct recipient selected.
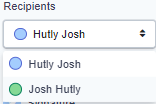
Recipient signing fields are colour coordinated for each separate recipient
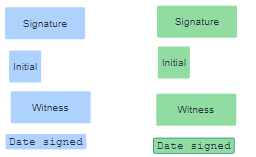
Add signing fields
Using a simple drag and drop interface you are able to quickly and easily add signing fields to your document, exactly where you want them.
Edit signing fields
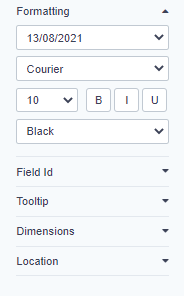
Clicking on a signing field will allow you to further customise the field behaviour and appearance

Some fields will have more options available to them than others
- More information on signing fields can be found here
Completing your envelope
When all signing fields have been added you can then complete your envelope using several options

Save & Close
To save your signing fields and exit your document without sending select Save & Close. This allows you to return to the document and continue adding fields at a later time.
Upon saving you will see a confirmation toast in the upper right hand corner of the page

Send for signing
Selecting Send for Signing finalises and sends your envelope to your recipients for signing.

Cancel
Selecting Cancel erases all added fields. You can restart preparing your document from your list of One Touch™ envelopes.
