
✍️ Say goodbye to printers, scanners, and paperwork pile-ups. With Hutly Sign, you can send forms directly to tenants, landlords, or agents for secure digital signing — fast, simple, and professional.
📸 What the Email Creation Screen Looks Like
Once you have completed your form and click on the Continue button, you will be ready to send it for digital signing.
Here’s the screen you’ll see once you click Continue after completing your form. This screen allows you to prepare the email to send your form for signing:
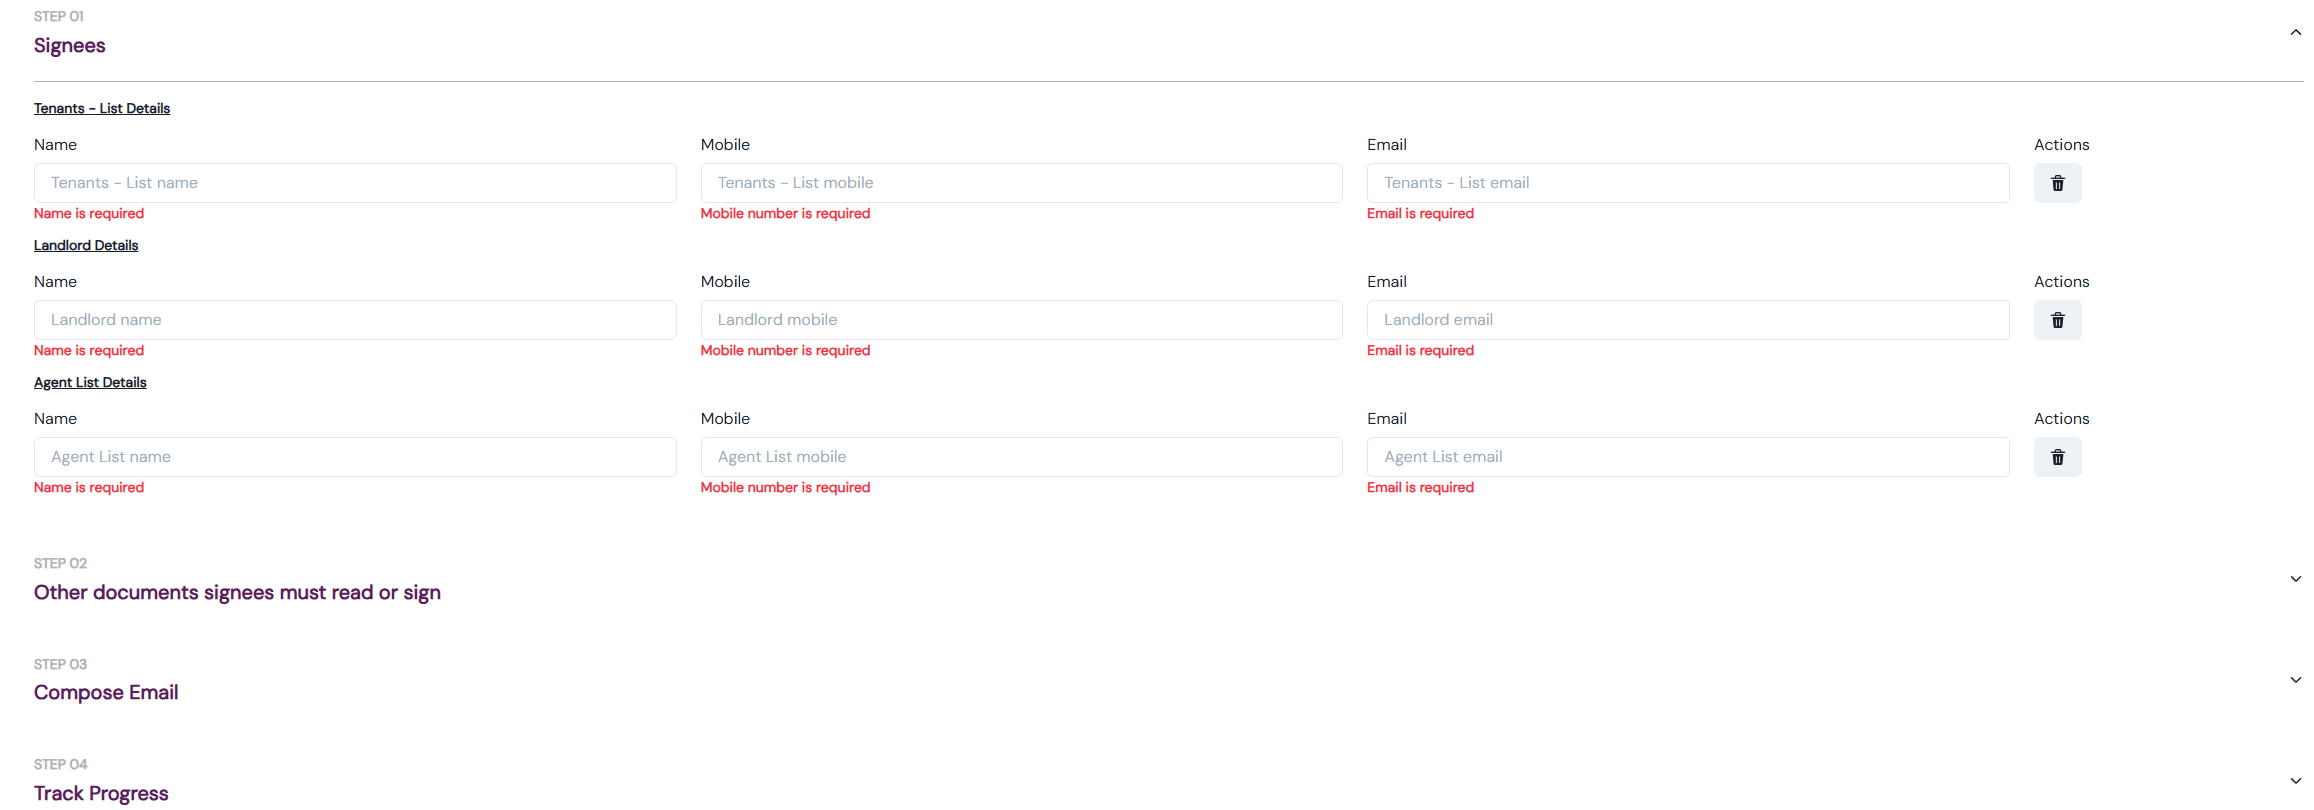
✅ Step 1: Review Signees
Hutly Sign takes care of the setup by pre-filling signee details (name, mobile, and email) from your form.
Double-check that everything looks correct.
Add or update any missing details.
Mandatory fields are clearly marked, so you won’t miss a step.
Don’t need someone included? Click the rubbish bin icon under Actions to remove them.
⚠️ Note on long names and signatures when using Hutly Sign
If a signee has a long name and their signature is cut off when signing, you can shorten the name only at this step when preparing documents to be sent using Hutly Sign.
To prevent the signature from being cut off, enter the first initial of the first name followed by the full last name (e.g., Johnathan Alexander Smith → J Smith). This ensures the complete signature appears on the signed document.
👉 Important:
-
The full legal name must remain in the body of the document. The adjustment can only be made to the name entered during email preparation, as this is the name that becomes the signee’s signature when using Hutly Sign.
-
Because the shortened name is also used to send the email, the recipient will see the email addressed to the shortened version (e.g., J Smith), not their full legal name.
📎 Step 2: Attach Other Documents
Need to send additional documents along with your form? No problem.
-
By default, signees can read these documents.
-
Want them signed as well? Tick the Enable Signing box.

When you enable signing, you’ll be able to add the essentials: name, signature, and date.
But what if you need something extra — like a business name field or a spot for a witness to sign?
✨ Easy! Just create a separate envelope using Hutly Sign. Click here for step-by-step instructions.
By doing this, everything stays neatly bundled together in one secure, organised package — simple for you, seamless for your clients. 🎉
✉️ Step 3: Compose Your Email
Next, prepare the email your signees will receive.
-
Subject line: Automatically fills with the property address — clear and professional - this cannot be edited
-
Message body:
-
Keep the default message for a quick option, or
-
Untick the box to write your own personalised message.

-
The email will include a secure link that lets your clients view and sign the form with ease.
📊 Step 4: Track Progress
Need to keep someone else in the loop? Simply add their name, mobile, and email in the Track Progress section. They’ll be copied in on the “signing success” email.

👉 No additional notifications required? Just leave the box unticked.
🚀 Step 5: Send the Form
Once all mandatory fields are complete, the Send Using Hutly Sign button in the top-right corner will turn purple.

Click it to send your form to all signees for digital signing. Done and dusted. 🎉
Please click here for information on tracking signing progress.
💡 Why Use Hutly Sign?
-
Save time – no more printing, scanning, or chasing paperwork.
-
Make it easy – clients can sign anywhere, anytime, on any device.
-
Stay secure – digital signatures are encrypted, verified, and legally binding.
-
Stay in the loop – track every step of the process.
👋 Need Help?
We’re here for you:
-
🌐 Explore our Knowledge Base
-
🤓 Book a training session
-
📧 Contact us at support@adlforms.com